Creating Interactive Images with Hotspots
Hotspots transform static images into interactive experiences by adding clickable areas that reveal additional information, trigger actions, or highlight specific features. This approach increases user engagement in educational content, product showcases, interactive maps, and many other use cases.

What Are Hotspots?
Hotspots are interactive areas placed on an image. When users click or hover over these areas, they can see text explanations, multimedia content, links, or visual highlights. This allows you to present layered information that users can explore at their own pace.
A hotspot often appears as an icon, button, or highlighted region. When activated, it can:
- Display text in tooltips or popups
- Show videos or images
- Redirect users to another page
- Highlight a specific part of the image with descriptive content
By using hotspots, you can avoid overwhelming users with too much information at once and instead guide them to focus on what matters most.
Use Cases
Interactive images with hotspots can be useful in many fields:
Education
Create visual tutorials with step-by-step explanations.
E-commerce
Highlight product features and specifications directly on product images.
Infographics
Add depth by allowing users to explore additional data points.
Maps and location content
Mark points of interest with contextual information.
Team presentations
Make group photos interactive by linking team members to short bios.
Technical documentation
Explain interface elements or workflows directly on software UI images.
How to Create Interactive Images
Most tools for creating interactive images follow a similar process:
- Upload or capture an image: Start with a high-quality image.
- Place hotspots: Add interactive areas where needed.
- Define hotspot content: Add text, media, or links for each hotspot.
- Style the elements: Adjust colors, icons, and tooltips to match your design.
- Publish or embed: Share your interactive image on websites, LMS platforms, or presentations.
Tools for Creating Hotspot Images
Here are several tools you can use to create interactive images with hotspots.
H5P
H5P is an open-source tool widely used in educational environments. It offers a dedicated Image Hotspots feature.
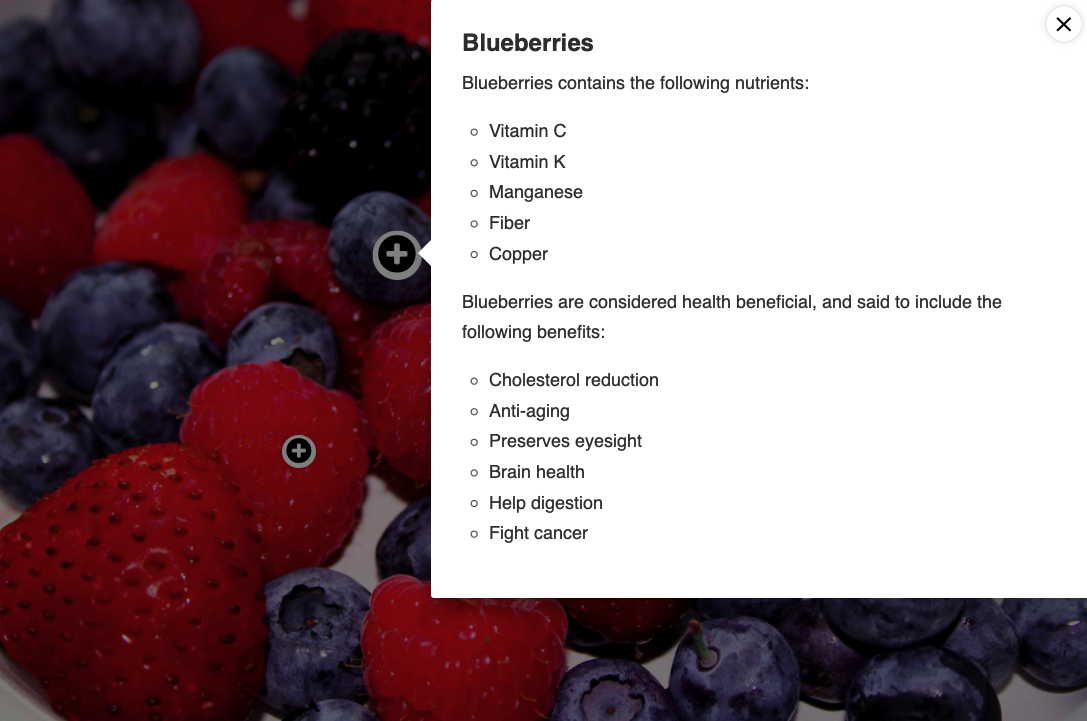
Key features
- Place hotspots freely on an image
- Add text, images, or videos in popups
- Embed content into learning platforms like Moodle, Canvas, and WordPress
You upload an image, define hotspot content, and apply custom styling to create a visually appealing and interactive result.
WordPress with Elementor
Elementor, a page builder for WordPress, includes a Hotspot widget.
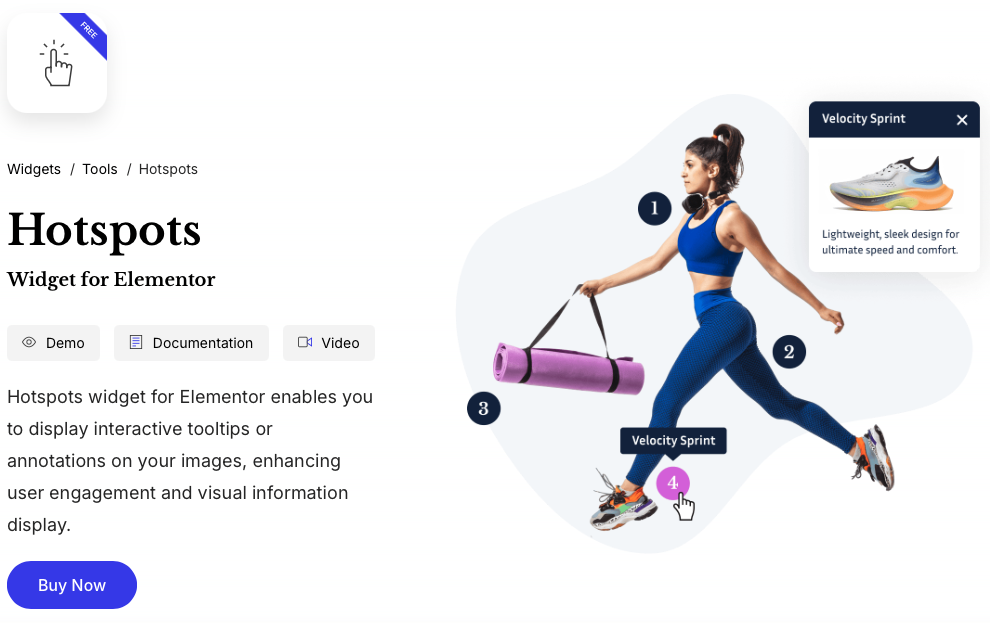
Key features
- Accurate positioning using horizontal and vertical offsets
- Responsive design support for mobile and desktop
- Customizable icons, animations, and tooltip styles
You add the widget to your page, choose an image, place hotspots using coordinates, and define the tooltip content.
Interactive-img.com
This platform specializes in hotspot images and offers a simple, focused interface.
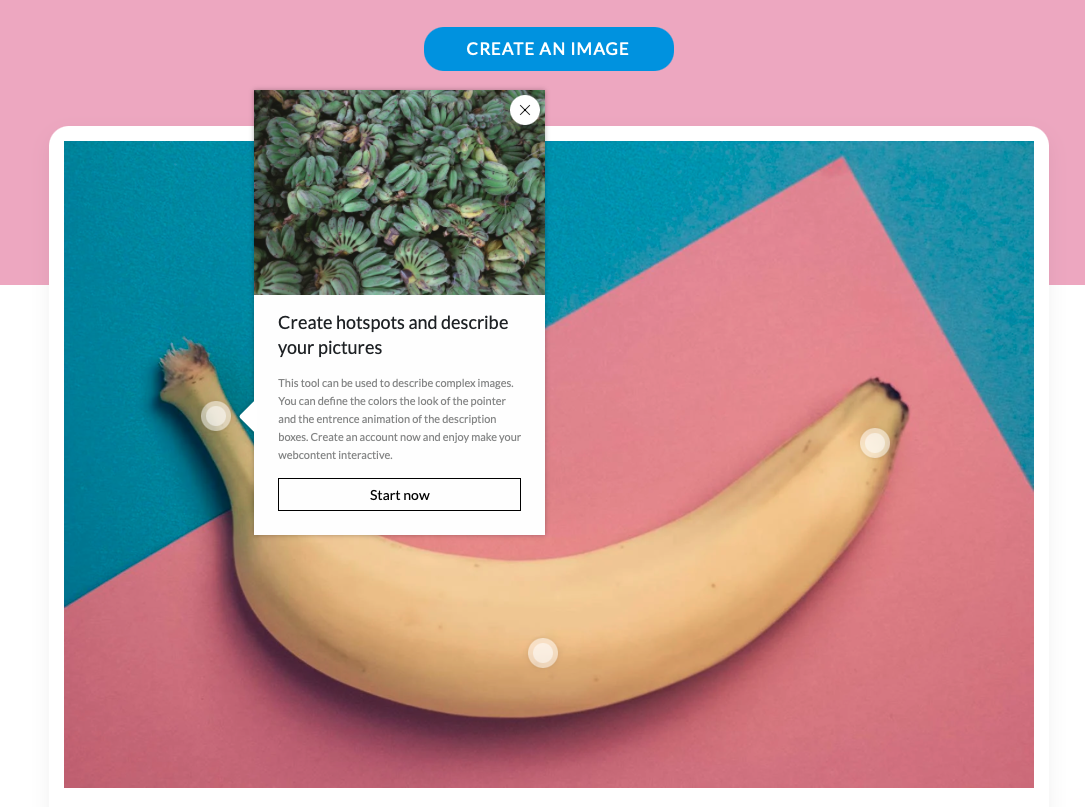
Key features
- Add hotspots by clicking on the image
- Customize icons, styles, and popup behavior
- Embed finished images into websites or CMS platforms
The process is quick: create an account, upload your image, add and configure hotspots, and embed the result.
ThingLink
ThingLink is a full-featured platform for creating interactive media.
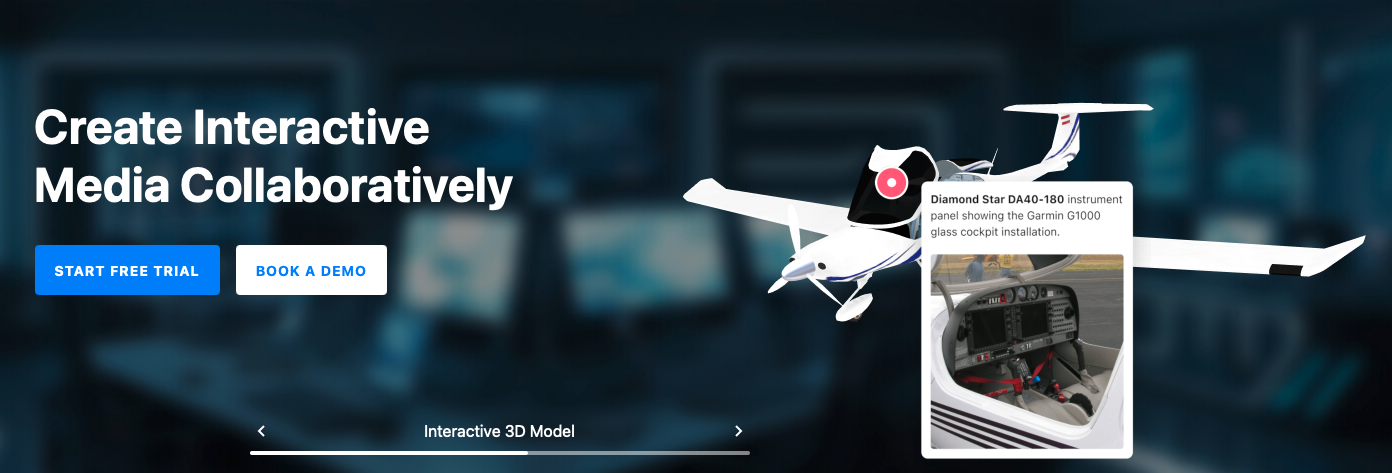
Key features
- Use different tag types (e.g., text, video, links)
- Customize tag icons and styles
- Add background audio for a richer experience
You upload an image, choose from available tag types, position them, and customize the appearance before publishing.
JetTricks Plugin for WordPress
JetTricks provides advanced customization options for hotspot functionality in WordPress.

Key features
- Place hotspots with flexible positioning
- Add tooltips with text or media
- Integrate with other WordPress design elements
You choose your image, define the content for each hotspot, and position it using percentage-based coordinates.
Best Practices for Effective Hotspot Design
Design considerations
- Strategic placement: Position hotspots where users naturally focus.
- Clear indicators: Use visual cues like icons or highlights to draw attention.
- Concise content: Keep tooltip text short and easy to understand.
- Responsive design: Make sure hotspots are correctly positioned on all screen sizes.
- Consistent styling: Use a uniform look for all hotspots to create a clean visual experience.
Technical tips
- Optimize image size: Use compressed images for faster loading.
- Support accessibility: Add alt text and keyboard navigation where possible.
- Test across devices: Verify functionality on desktops, tablets, and mobile devices.
- Avoid clutter: Limit the number of hotspots to keep the image clear and focused.