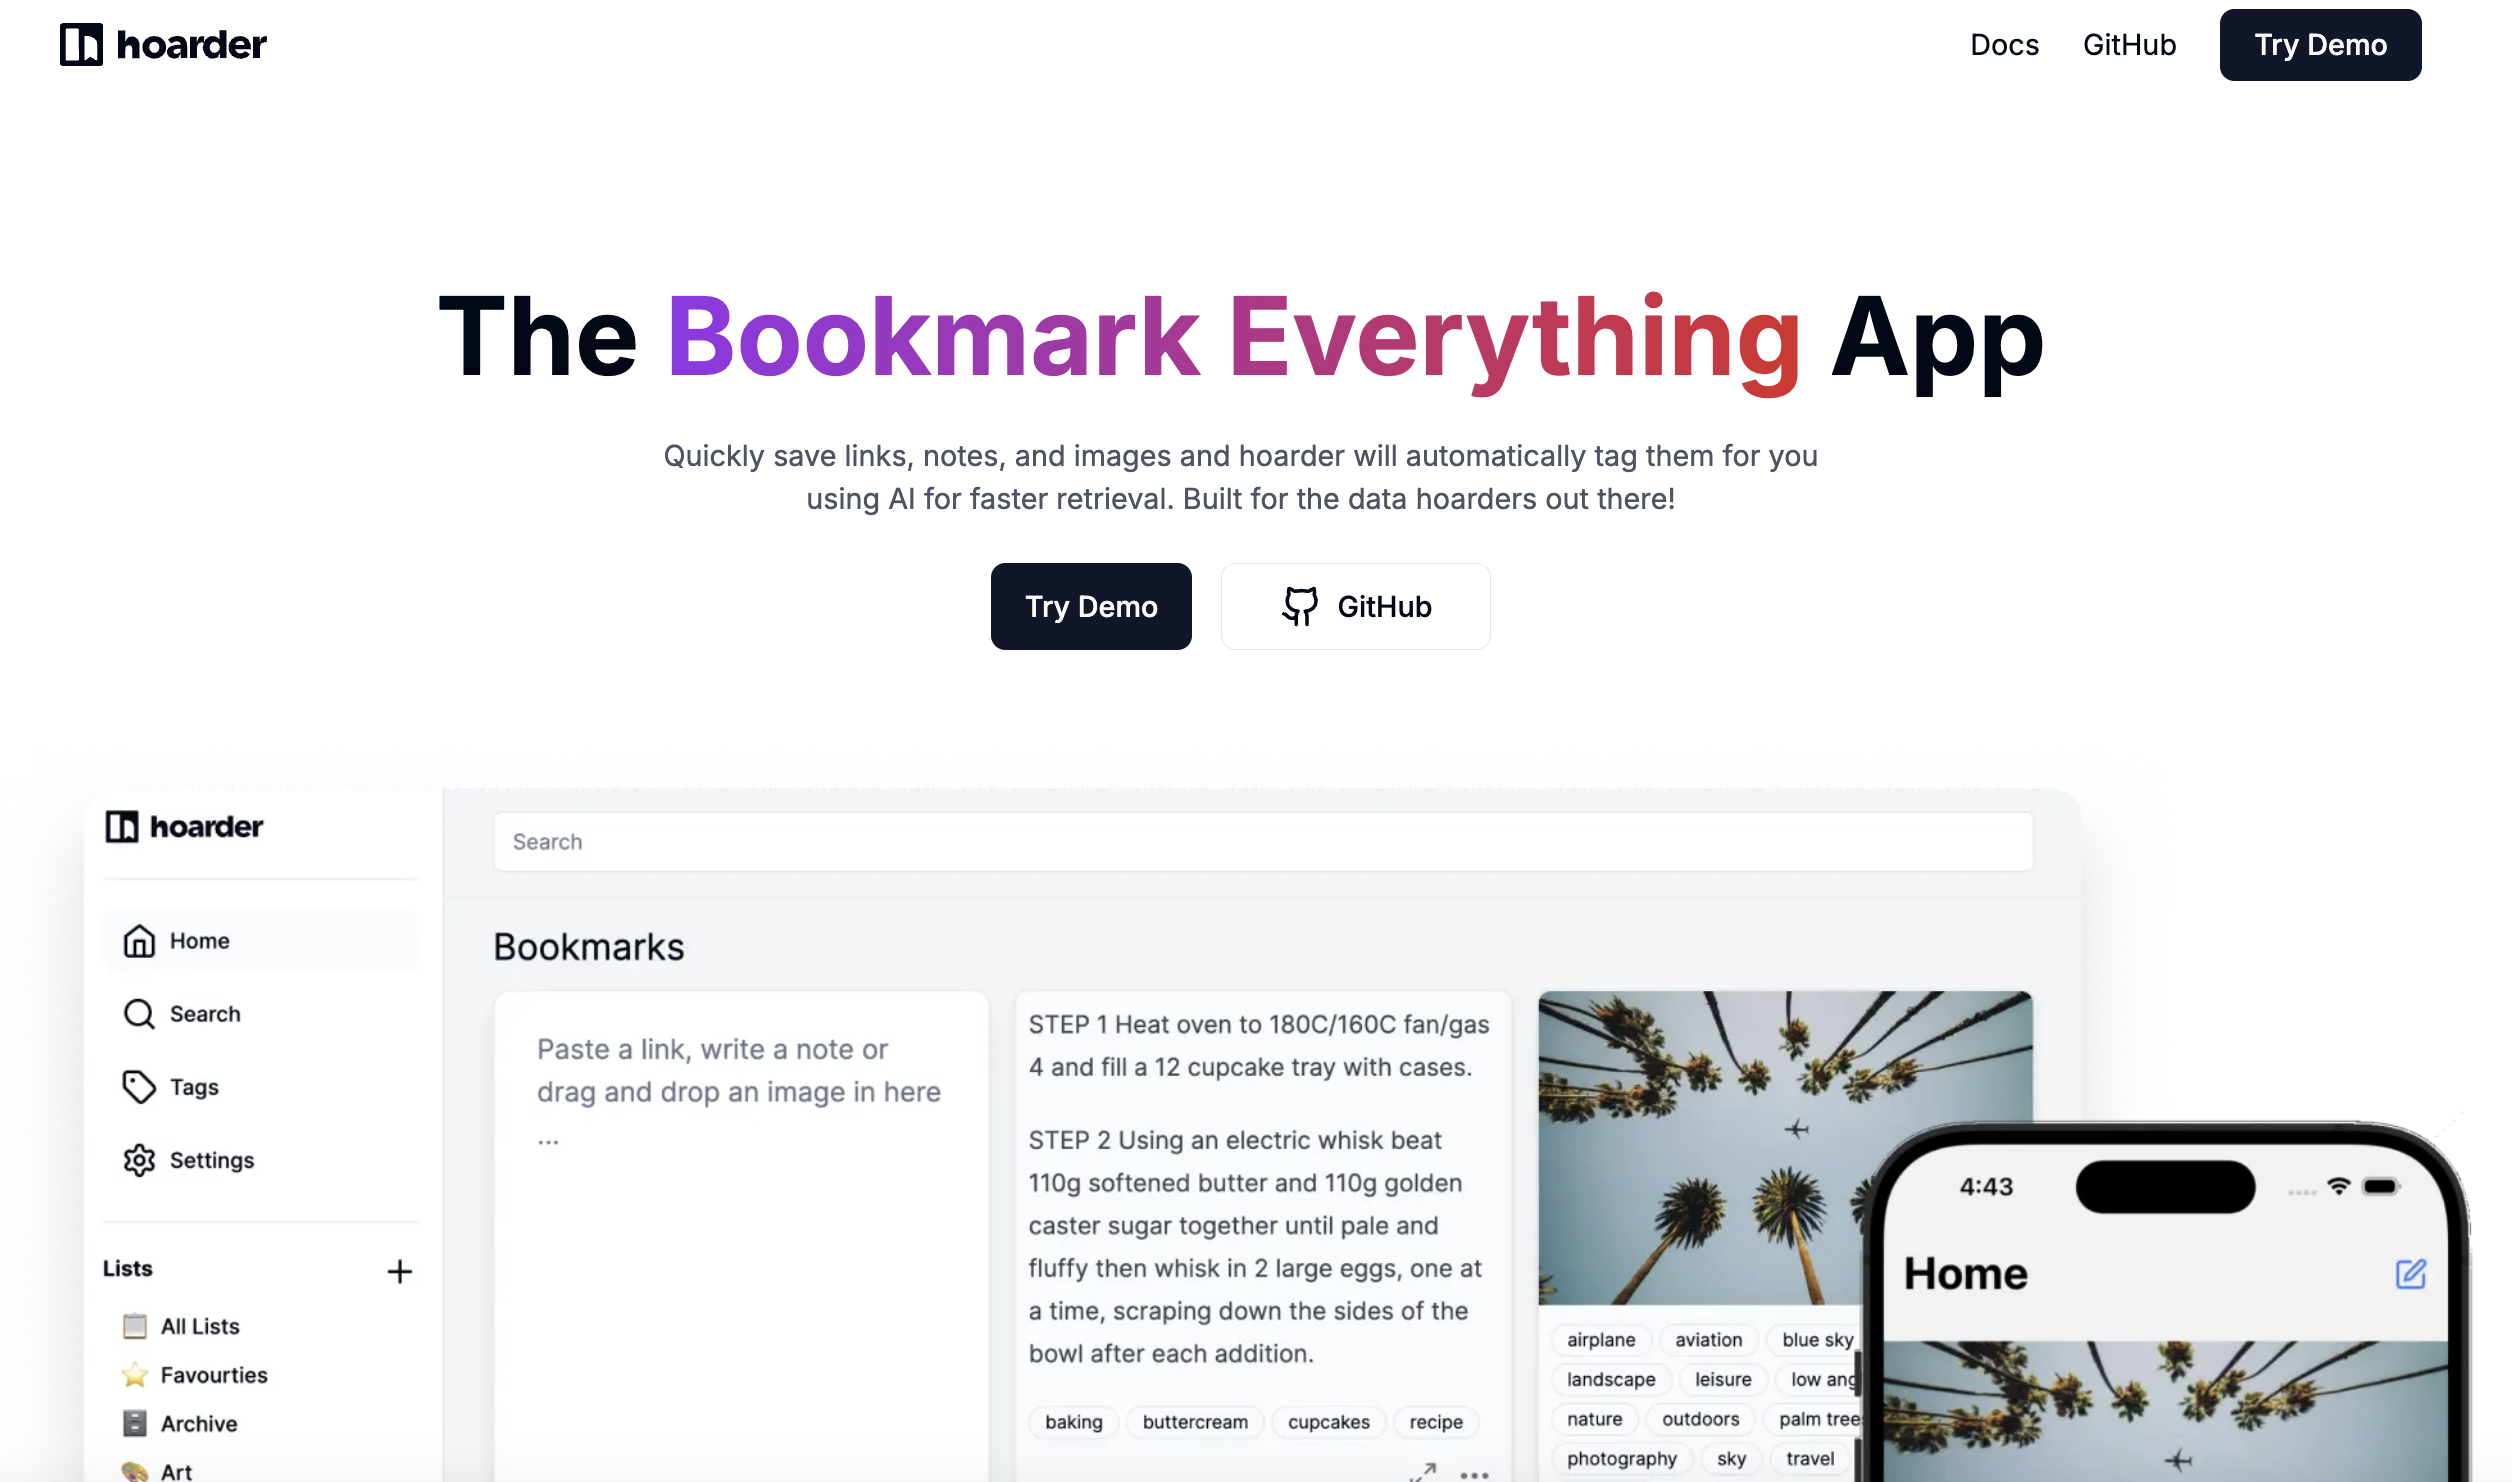
AI-Powered Bookmarking with Hoarder
Hoarder is an open-source, self-hosted bookmark manager powered by AI that helps you save and organize web content. Unlike traditional bookmark systems, Hoarder features AI tagging, full-page archiving, powerful search, and mobile apps to access your content from anywhere.
Prerequisites
Hoarder offers several installation options, but using Docker Desktop is the easiest and most reliable way to get started. Docker Desktop includes both Docker and Docker Compose, which are required to run Hoarder.
If Docker Desktop isn’t installed yet, follow these steps to set it up:
- Download it from Docker's official website.
- Install Docker Desktop by dragging it to your Applications folder.
- Launch Docker Desktop and wait for it to fully start (the whale icon in your menu bar will indicate when it's ready).
Creating a directory for your Hoarder setup
First, you'll create a dedicated directory to store all Hoarder-related files:
-
Open Terminal.
-
Create a new directory with this command:
$ mkdir ~/hoarder-app -
Navigate into that directory:
$ cd ~/hoarder-app
This creates the hoarder-app in your home directory, giving you a clean, organized place for your Hoarder installation.
Downloading the Docker Compose file
The Docker Compose file defines all the services Hoarder needs to run properly.
curl -O https://raw.githubusercontent.com/hoarder-app/hoarder/main/docker/docker-compose.yml
When you run this command, you should see progress information as the file downloads. This file contains the complete service setup for Hoarder, including database configuration and networking.
Setting up environment variables
Environment variables help you configure your Hoarder installation without modifying the core files. Here's how to set them up:
-
Create an
.envfile in your hoarder-app directory:touch .env -
You'll need to generate two secure random strings. In your Terminal, run this command twice:
$ openssl rand -base64 36 -
Open the
.envfile with your favorite text editor, and add the following configuration:HOARDER_VERSION=release
NEXTAUTH_SECRET=your_first_random_string_here
MEILI_MASTER_KEY=your_second_random_string_here
NEXTAUTH_URL=http://localhost:3000What these variables do:
HOARDER_VERSION=releasetells Docker to use the latest stable version of Hoarder.NEXTAUTH_SECRETis used for securely encrypting session data.MEILI_MASTER_KEYsecures the search functionality.NEXTAUTH_URLtells the authentication system where your app is located.
-
Replace the placeholder values
your_first_random_string_hereandyour_second_random_string_herewith your random strings. -
Save and close the file.
Configuring AI tagging with OpenAI
One of Hoarder's most powerful features is automatic AI tagging of your bookmarks. To enable this:
-
You'll need an OpenAI API key. If you don't have one yet:
- Go to OpenAI's platform.
- Create an account if needed.
- Navigate to the API keys section.
- Create a new API key and give it a name like Hoarder app.
- Copy the key (you won't be able to see it again!)
-
Add the key to your
.envfile:OPENAI_API_KEY=your_openai_api_key_here
OpenAI charges based on usage, but Hoarder's tagging uses minimal tokens, keeping costs very low. Most users spend only a few cents per month.
If you prefer to keep everything local, you can use Ollama instead. This runs AI models locally on your Mac, though it requires more system resources.
Launching Hoarder
Now you're ready to start Hoarder:
-
In Terminal, make sure you're still in your
hoarder-appdirectory (cd ~/hoarder-appif needed). -
Run this command to start Hoarder in the background:
docker compose up -d
This will download all the necessary images (this might take a few minutes the first time). You'll see progress information for each service. When complete, all Hoarder services will be running in the background.
To verify everything is running properly, you can check by running the following command:
$ docker compose ps
Accessing your Hoarder installation
Once the services are up and running:
-
Open your preferred web browser.
-
Navigate to http://localhost:3000. You should see the Hoarder sign-in page.
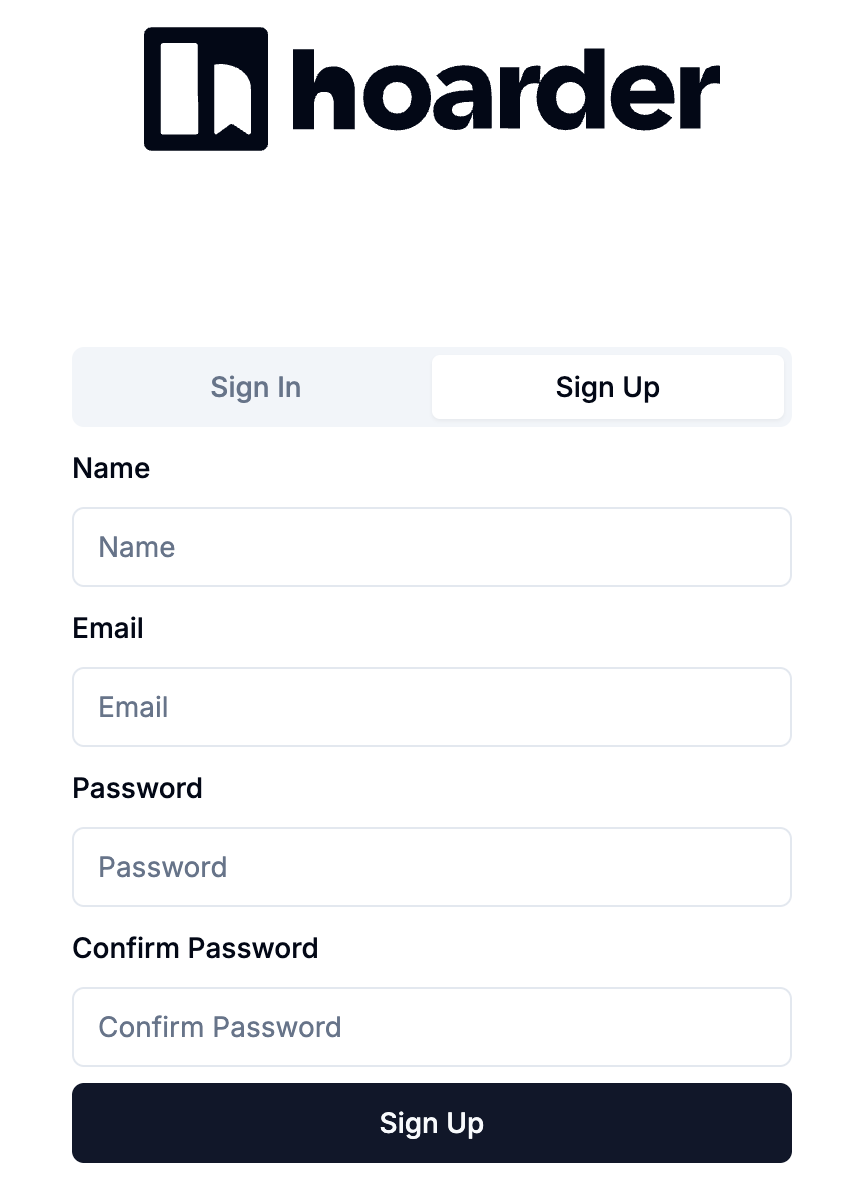
- Create your account and start hoarding your favorite content.
Why do I need to create an account in Hoarder, even when running it locally?
Hoarder requires you to create a local account to manage your session and keep your data secure. Even if you're running Hoarder on your local machine without internet access, the authentication system helps:
-
Protect your bookmarks and personal data
-
Keep you logged in during your session
-
Support multiple users on the same installation (e.g. family or team members)
Your account is completely local—no data is sent to external servers, and all credentials are stored securely in your laptop’s local database.